Showing posts with label thrift store find. Show all posts

Wednesday, May 28, 2014

Dresser Makeover

Here was a quick update I did to a dresser I found at Goodwill for $50. The dresser itself was solid wood. All the drawers worked great except for three that needed new drawer guides (which I bought at Home Depot for a couple dollars).


I took the drawers off, removed the hardware and sanded down the paint where the flowers were. I wanted a nice smooth surface. Then I took a tack cloth to remove any dust and gave them a nice even coat of aqua spray paint.


I decided to keep the rest of the dresser the original color. Besides a few dings and scratches the paint was fine. And truth be told, this dresser was going in my daughters' room. My kids aren't always easy on furniture anyway!


I decided to spray the hardware as well. I had Heirloom White on hand which matched the rest of the dresser so I just used that. I had just enough to do the job. Overall, I'm very pleased with the result! It was a very easy update and it made a huge difference! And my daughter loves having a bigger dresser for all her clothes.


Happy DIYing!

Friday, May 10, 2013

Master Bedroom Nightstand Redo

Good things come to those who wait. And I've been waiting for a long time for a matching set of nightstands for our bedroom. In all the years we've been married, we've never had a matching set, actually. The past few months I've been searching craigslist and thrift stores for the perfect pair. Well, it's surprisingly difficult to find a matching set. There are tons of single nightstands out there, but matching ones? Not so much.

Well, my luck turned around when I found these glorious, hunter green, log cabin-style nightstands. Beautiful, right? They were solid wood and had minor dents and scratches. Did I mention they were solid wood? The drawers were also in good shape (nothing wonky or wobbly). And the best part? They were only $20 each. Yup. They just needed to be made pretty.


I don't have any pictures of the process, but it's pretty easy (you just need to be patient and wait the recommended time between coats of paint, stain and finish). I used wood putty on any dents and then sanded the whole piece. I completely removed the finish and stain on the top portion and just roughed up the rest. I added some trim to the drawers that was left behind by the previous owners of our house (thank you previous owners!).  I filled in any cracks or nail holes with painter's caulk. I used Rustoleum's Heirloom White on the body, and Dark Walnut stain on the top. After a few coats of Polyurethane, they're good to go. I also lightly sanded inbetween coats of paint, stain, and Poly to get a nice smooth finish. I bought simple oil rubbed bronze pulls to replace the old wooden ones. Now I just need to move them into their new home: my bedroom!


Happy thrifting and DIYing!

Wednesday, April 24, 2013

Clear Glass Lamp Redo

I am so thrilled to share my latest thrift store find. This lovely pair of glass lamps were definitely from another decade. But I took one look at them and knew they could easily be updated and be really chic. In fact, I quickly grabbed them off the shelf at Goodwill before anyone else had any ideas. These lamps were MINE!


They had a thin film of amber-colored glass glaze that was flaking off. So I used a razor blade to scrape it all off the glass so they were completely clear.


Better already, right?


Then I took out the old wiring (I was worried about them being a fire hazard) and replaced them with new cords. I also spray painted the bases and all the metal pieces with a Rustoleum Satin Nickel spray paint. After reassembling I just popped on a new shade and BAM!
Gorgeous.


Can you believe that these lamps were only $10 a piece? Add another $11 for each lamp kit and $15 for the shade and you have a grand total of = $36 per lamp!! That's a lot easier on the wallet than this one from Pottery Barn for $199...


And that's just for the lamp base, folks.

Happy thrifting!

Wednesday, September 14, 2011

Two-tiered Yellow Skirt


I found a top at Goodwill that was made from a fun yellow floral.  I didn't like it as a top (not to mention it was an extra large) so I turned it into a skirt.
See all this yummy yellow goodness?


I took it apart and put it back together by adding another layer of white fabric underneath.  It needed to be lined anyway plus I wanted it longer. The felt flower is one I made awhile back and is just pinned onto the sash part of the skirt.  I can easily remove it if my mood calls for more simplicity. (I happen to really like adding a flower to my outfits though!)

 I also added a little bit of elastic in the back to make it easier to put on.  I love it!


I know summer's almost over, but yellow makes me happy.  So I will definitely be sporting my sunny yellow two-tiered skirt well into the cold season. :o)


By the way, my eight-year-old daughter took all the pics of me.  A photographer in the making perhaps?

Happy sewing!


Monday, September 12, 2011

Footstool Makeover


Over the summer the kids and I made the long 900 mile drive up to Oregon so we could visit my family.  While there I took advantage of the numerous thrift stores available to those lucky Oregonians (it really isn't fair--I have one measly little Goodwill down here.) Anyway, I found this footstool at a thrift store for $3.99 and thought it had good photo prop potential.  So I happily paid for it and packed it away in the van for the drive back home.


I finally got around to transforming this ugly duckling of a footstool the other day.  I made a fun discovery while taking apart the seat portion.  It was padded with shreds and shreds of old newspaper from the 1950s!  How cool is that?  I got to try and piece together little advertisements like "gloves for $0.77" and "plaid shirts for $1.34". My favorite one was for "Rayve" permanent for your hair.  The movie show times were fun to look at... although the only movie I recognized was Disney's "Treasure Island".


Anyway, back to the footstool. I took it apart then sanded and painted the wood frame.  I decided to give it a distressed look.  Then I recovered the seat with some Amy Butler lovliness.  This is from the Midwest Modern collection.  Love her fabrics.


Using the staple gun made this a breeze.  Then attach the seat back onto the frame with screws and DONE!


This one really was easy peasy pie.
And guess who uses it to reach the play kitchen?


She loves being able to reach the sink and stove now.


Here's one last before and after!


Happy crafting!

Monday, May 23, 2011

Pillowcase Dress from a Woman's Blouse

I thrifted this woman's blouse for about $3.50. It didn't fit me but I loved the fabric and the colors (red and grey are one of my favorite color combinations). And I loved the pleated detail on the front. I bought it thinking I would cut it up to make a skirt for Olivia but changed my mind. I decided to make a simple pillowcase dress instead.


Here's the before and after.


Coincidentally, that little flower clip she's wearing, that just so happens to match this new little dress perfectly and that had been in my Etsy shop for months with no interest was purchased the same day I finished the dress. :o)  Oh well!

To see the a tutorial on how I made it, go here!
Happy sewing!

Monday, May 2, 2011

Refinished TV Stand

Several months back we started shopping around for a TV stand.  We had some money set aside as "fun money" to buy a new TV but we didn't have anything to put it on.  I don't know if you've shopped around lately for entertainment centers but most pieces that were reasonable in price were not even solid wood!  To get solid wood, you were looking at spending hundreds of dollars.  So we started checking craigslist.  We came across an old mid-century dresser for $100.  It had good bones and it was solid wood.  The finish was old but we had planned on refinishing whatever we found anyway. 

So we got to work. 
Here's what the old finish looked like (you can see I already started sanding the side).


This is after it was completely sanded.  Sanding is a lot of work, by the way (even with a power sander).


Here it is after the stain was applied.  Staining is a lot of work, too, ha ha!  There were some areas that the stain didn't want to "stick" to as well.  It just gives it a slightly distressed look which I love.


After the stain we applied three clear coats of polyurethane and then all the hardware!


And here it is in the living room with our new TV.


It holds all of our DVDs.  In fact, we have plenty of room to spare.  The drawers are deep enough to hold two rows of DVDs.


Scriptures go here...


Remotes go here...


Video games systems here...


And video games in here...


And lastly, we removed the drawer that goes here and converted it into an open shelf for our DISH receiver.  Our DVD player doesn't fit in there but it's so slim that we just set it on top by the TV. 


Overall, we're really happy with the way it turned out.  It was a lot of work but worth it.  We ended up spending about $150 total (that includes the price of the dresser, all new hardware, stain and supplies.)  We saved hundreds by doing it ourselves!  So next time you're thinking of buying new, consider buying old instead! It's a bit more work but very satisfying.  

Happy DIYing!

Wednesday, February 23, 2011

Play Kitchen

To kick off this creative blog, I have a monster of a project.  It took a month to complete which I should have expected with four kids.  But I am so happy that it's finally finished!

The play kitchen!


After getting tons of inspiration online (just go herehere and 
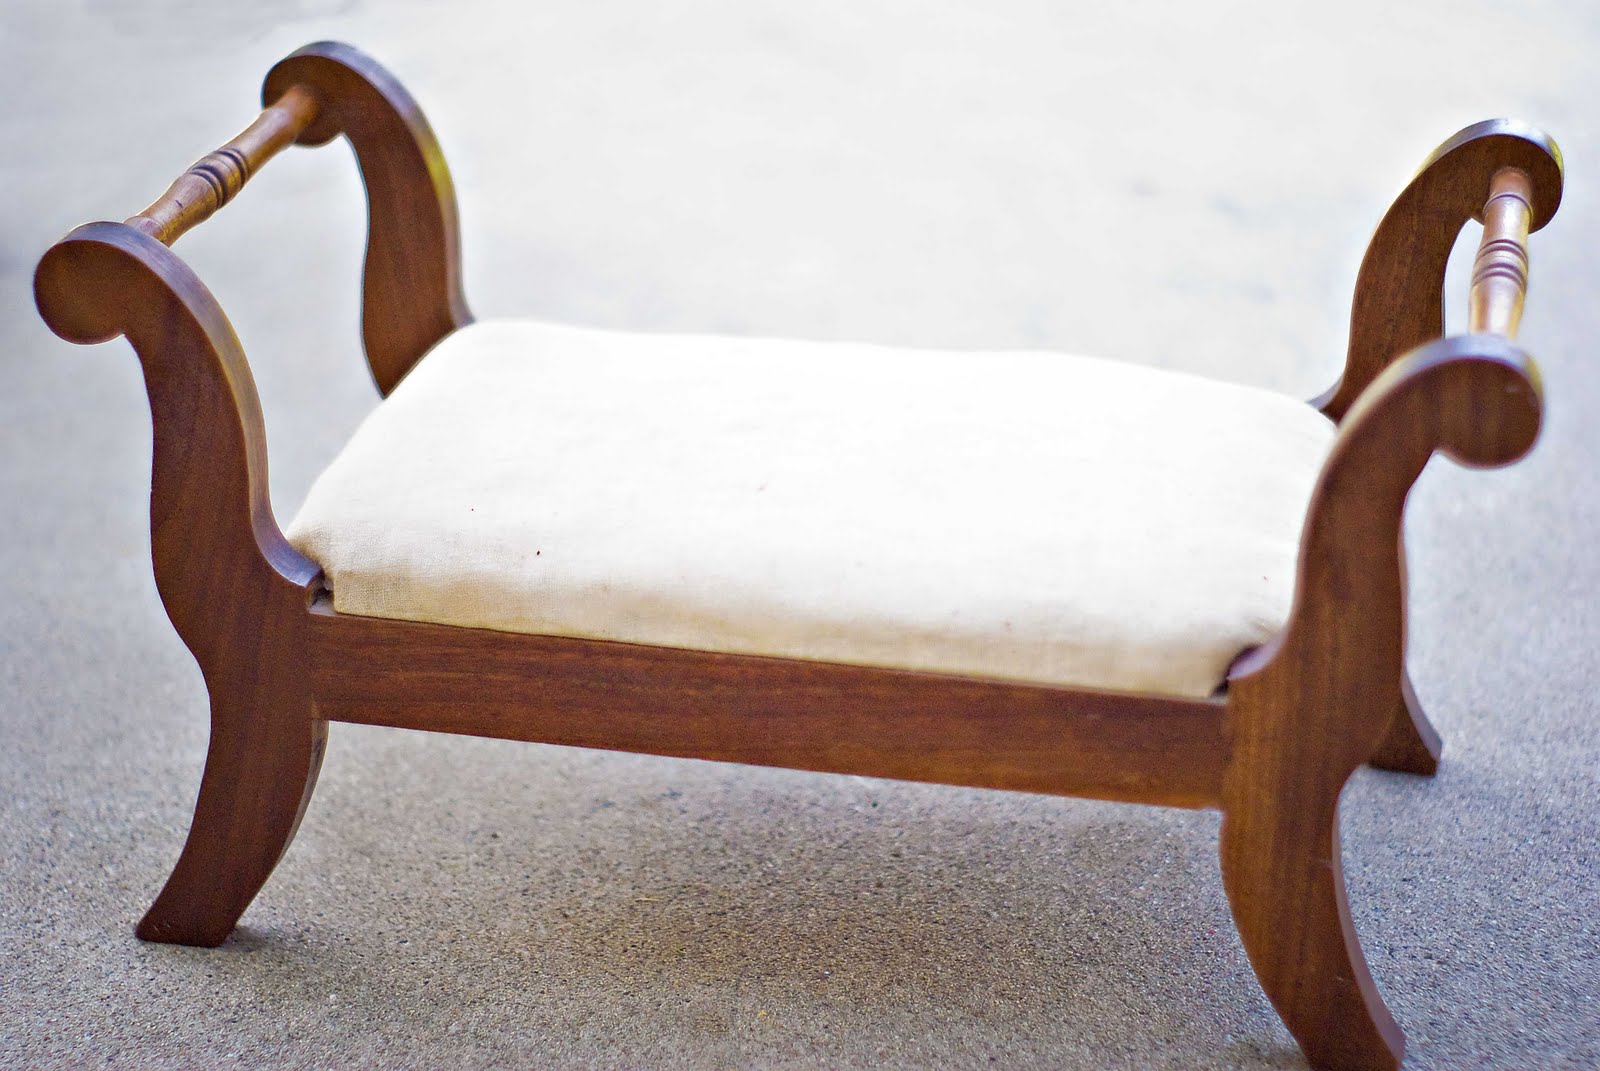
here for some fun play kitchen eye candy!) and searching craigslist for the perfect piece of furniture, I found this.


I took one look at it and knew it was meant to be a play kitchen.  The lady I bought it from was so nice.  She sold it to me for $60.  I was so excited! 
  
The hardest part of the entire kitchen redo was cutting out the holes for the sink and burners.  I thought I was going to die.  My jigsaw blade snapped off once (my heart stopped for a second there) and then after a few seconds of cutting, there would be so much friction that the wood would start smoking.  I thought the whole thing would catch on fire.  This is when I find out this thing was solid oak!

  When I was down to the last few inches on the last hole and didn't think the jigsaw (and my nerves) could take anymore I just drilled several small holes along the cut line and hammered it out.  I sanded it as much as I could.  It isn't pretty but you don't even see it anyway so who cares?


I added some trim here and there and then painted the whole thing. (EDIT: For anyone interested, I used Behr's Seafoam Pearl to paint this kitchen.) The back splash is just a 1 x 6 painted and découpaged with paper squares.  I just so happened to have a square paper punch handy so getting uniform squares was a breeze.  I chose colors that matched the fabrics I had already purchased (the main fabric used for the curtain and hot pads is from Amy Butler's Soul Blossoms collection).


The sink is just a metal bowl from the dollar store with an added sink strainer (also from the dollar store) screwed to the bottom to give it a more "sink like" appearance.  The faucet, burners and knobs were purchased at a recycle center.  The faucet was $5.00, the burners were $1.50 each (including the drip pans) and the knobs were $0.75 a piece.  The burners were spray painted to look newer and the knobs and faucet just needed to be cleaned up.


The window was something I already had that my grandpa made for us.  I just sewed the curtain and added little scallop trim underneath the window sill to help hide the lighting.  And speaking of lighting...


I used rope lighting under the window to create down lighting on the countertop and then had that wrap around to the back and back through into the stove (idea came from my mom).  I coiled it on the stove's ceiling to create a nice light-up effect.  I only wish I could have had an on/off switch for the lighting.  I have to plug and unplug it everytime. (EDIT: A reader suggested using one of those push button on/off switch plug-ins you can buy and around Christmas to plug the lights into. I found one and now can just push that little sucker to turn the lights on and off!)


 I built a platform for the cookie cooling racks, a.k.a. the oven rack, to sit on.  The oven door is a piece of MDF that I had cut to size.  I cut out the hole myself though with the jigsaw.  I bought a piece of plexi-glass from a local plastic supplier for about $6.00.

Mmmmm.  Pie anyone?

For the oven knobs, I bought some old oven knobs at the same recycle center that I bought the burners, faucet and stove knobs from. I just removed the old yucky knob part and replaced it with a washer and a sparkly $2.00 acrylic knob from Michaels.  Doesn't it look pretty?  Even if you can't twist them, I love how they turned out.


I also picked up a couple more acrylic knobs from Michaels for the cupboard/refrigerator doors but I chose the lime green color for variety.


 And the cupboard is big enough to hold all the play food, play dishes and any other toys that don't have a home yet.


For the side of the kitchen I added a magnetic whiteboard and hand made wooden clock.  I bought a whiteboard but didn't like the plastic frame it came in.  So I took it apart and built my own frame. It's not perfect, but I don't care!


The magnets (except for the kitty one and the flowers) were hand made by me using découpage.  The clock was also découpaged with scrapbook paper and numbers cut out on my cricut.  The clock's hands are movable so the kids can practice telling time!  Pretty and practical!

The whole kitchen sits on our hearth blocking the fireplace we never used anyway.  Oh, and see that cute little apron hanging up on the side?  My mom made that for Shailey for her birthday using a second hand blouse.  She's in the process of setting up her own Etsy shop selling fun things made from second hand clothing.  Keep checking Second Chances by Susan on Etsy because she plans to set up her shop soon! (EDIT: For those wondering about the little pink phone, it actually works... when it's plugged in. It used to be a cream color but I spray painted it pink!)


Overall, I am so happy with the way it turned out.  It was worth all the time and effort that went into it.  Thanks to all the wonderful inspiration out there!  Keep making beautiful things and inspiring others to do the same!  Happy crafting!